Installing LAMP (Linux, Apache, MariaDB, PHP/PhpMyAdmin) in RHEL/CentOS 7.0
Step 1: Install Apache Server with Basic Configurations
1. After performing a minimal system installation and configure your server network interface with a Static IP Address on RHEL/CentOS 7.0, go ahead and install Apache 2.4 httpd service binary package provided form official repositories using the following command.
# yum install httpd
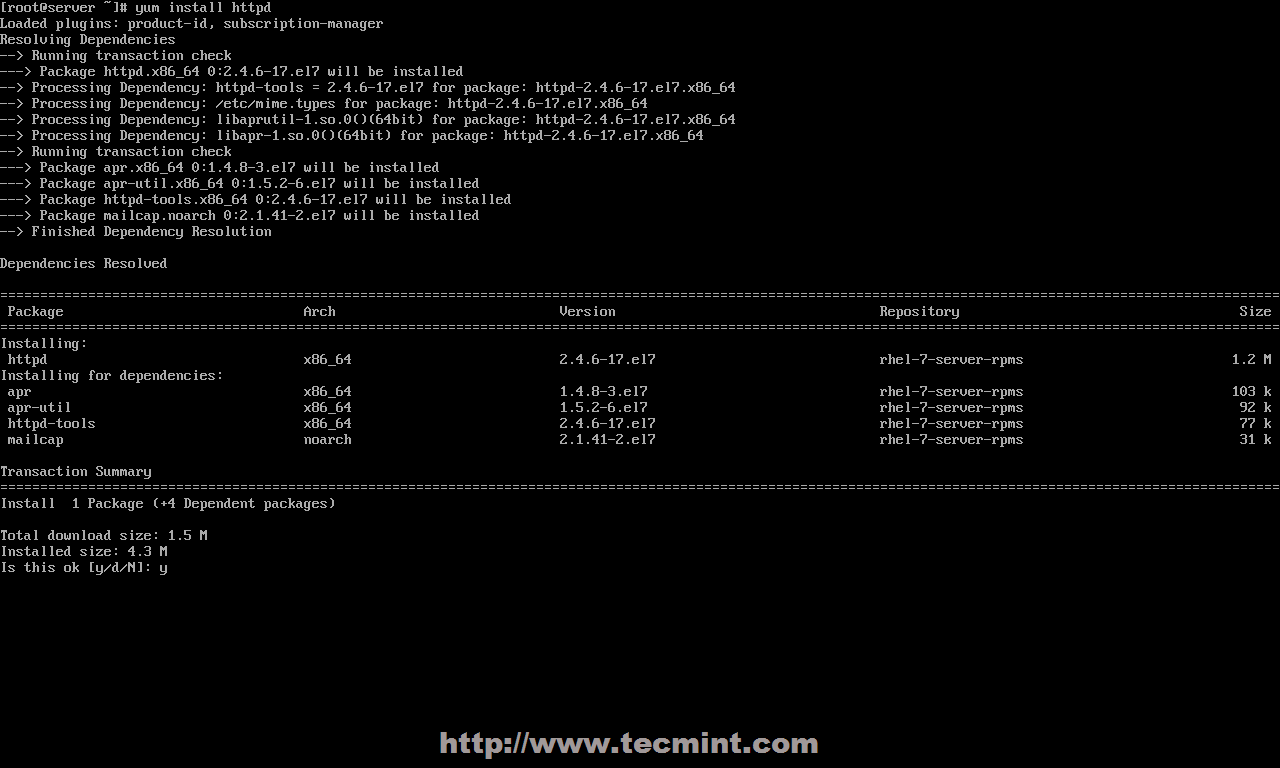
Install Apache Web Server
2. After yum manager finish installation, use the following commands to manage Apache daemon, since RHEL and CentOS 7.0 both migrated their init scripts from SysV to systemd – you can also use SysV and Apache scripts the same time to manage the service.
# systemctl status|start|stop|restart|reload httpd

OR

# service httpd status|start|stop|restart|reload

OR

# apachectl configtest| graceful

Start Apache Web Server
3. On the next step start Apache service using systemd init script and open RHEL/CentOS 7.0 Firewall rules using firewall-cmd, which is the default command to manage iptables through firewalld daemon.
# firewall-cmd --add-service=http
NOTE: Make notice that using this rule will lose its effect after a system reboot or firewalld service restart, because it opens on-fly rules, which are not applied permanently. To apply consistency iptables rules on firewall use –permanent option and restart firewalld service to take effect.
# firewall-cmd --permanent --add-service=http
# systemctl restart firewalld

Enable Firewall in CentOS 7
Other important Firewalld options are presented below:
# firewall-cmd --state
# firewall-cmd --list-all
# firewall-cmd --list-interfaces
# firewall-cmd --get-service
# firewall-cmd --query-service service_name
# firewall-cmd --add-port=8080/tcp
4. To verify Apache functionality open a remote browser and type your server IP Address using HTTP protocol on URL (http://server_IP), and a default page should appear like in the screenshot below.

Apache Default Page
5. For now, Apache DocumentRoot path it’s set to /var/www/html system path, which by default doesn’t provide any index file. If you want to see a directory list of your DocumentRoot path open Apache welcome configuration file and set Indexes statement from – to + on <LocationMach> directive, using the below screenshot as an example.
# nano /etc/httpd/conf.d/welcome.conf

Apache Directory Listing
6. Close the file, restart Apache service to reflect changes and reload your browser page to see the final result.
# systemctl restart httpd

Apache Index File
Step 2: Install PHP5 Support for Apache
7. Before installing PHP5 dynamic language support for Apache, get a full list of available PHP modules and extensions using the following command.
# yum search php

Install PHP in CentOS 7
8. Depending on what type of applications you want to use, install the required PHP modules from the above list, but for a basic MariaDB support in PHP and PhpMyAdmin you need to install the following modules.
# yum install php php-mysql php-pdo php-gd php-mbstring

Install PHP Modules

Install PHP mbstring Module
9. To get a full information list on PHP from your browser, create a info.php file on Apache Document Root using the following command from root account, restart httpd service and direct your browser to the http://server_IP/info.php address.
# echo "<?php phpinfo(); ?>" > /var/www/html/info.php
# systemctl restart httpd

Check PHP Info in CentOS 7
10. If you get an error on PHP Date and Timezone, open php.ini configuration file, search and uncomment date.timezone statement, append your physical location and restart Apache daemon.
# nano /etc/php.ini
Locate and change date.timezone line to look like this, using PHP Supported Timezones list.
date.timezone = Continent/City

Set Timezone in PHP
Step 3: Install and Configure MariaDB Database
11. Red Hat Enterprise Linux/CentOS 7.0 switched from MySQL to MariaDB for its default database management system. To install MariaDB database use the following command.
# yum install mariadb-server mariadb

Install MariaDB in CentOS 7
12. After MariaDB package is installed, start database daemon and use mysql_secure_installation script to secure database (set root password, disable remotely logon from root, remove test database and remove anonymous users).
# systemctl start mariadb
# mysql_secure_installation

Start MariaDB Database

Secure MySQL Installation
13. To test database functionality login to MariaDB using its root account and exit using quit statement.
mysql -u root -p
MariaDB > SHOW VARIABLES;
MariaDB > quit

Connect MySQL Database
Step 4: Install PhpMyAdmin
14. By default official RHEL 7.0 or CentOS 7.0 repositories doesn’t provide any binary package for PhpMyAdmin Web Interface. If you are uncomfortable using MySQL command line to manage your database you can install PhpMyAdmin package by enabling CentOS 7.0 rpmforge repositories using the following command.
# yum install http://pkgs.repoforge.org/rpmforge-release/rpmforge-release-0.5.3-1.el7.rf.x86_64.rpm
After enabling rpmforge repository, next install PhpMyAdmin.
# yum install phpmyadmin

Enable RPMForge Repository
15. Next configure PhpMyAdmin to allow connections from remote hosts by editing phpmyadmin.conf file, located on Apache conf.d directory, commenting the following lines.
# nano /etc/httpd/conf.d/phpmyadmin.conf
Use a # and comment this lines.
# Order Deny,Allow
# Deny from all
# Allow from 127.0.0.1

Allow Remote PhpMyAdmin Access
16. To be able to login to PhpMyAdmin Web interface using cookie authentication method add a blowfish string to phpmyadmin config.inc.php file like in the screenshot below using the generate a secret string, restart Apache Web service and direct your browser to the URL address http://server_IP/phpmyadmin/.
# nano /etc/httpd/conf.d/phpmyadmin.conf
# systemctl restart  httpd

Add Blowfish in PhpMyAdmin

PhpMyAdmin Dashboard
Step 5: Enable LAMP System-wide
17. If you need MariaDB and Apache services to be automatically started after reboot issue the following commands to enable them system-wide.
# systemctl enable mariadb
# systemctl enable httpd

Enable Services System Wide
That’s all it takes for a basic LAMP installation on Red Hat Enterprise 7.0 or CentOS 7.0. The next series of articles related to LAMP stack on CentOS/RHEL 7.0 will discuss how to create Virtual Hosts, generate SSL Certificates and Keys and add SSL transaction support for Apache HTTP Server.